At Long Last: The Compendium for Nurburgring Nordschleife
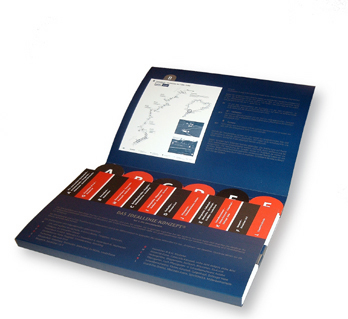
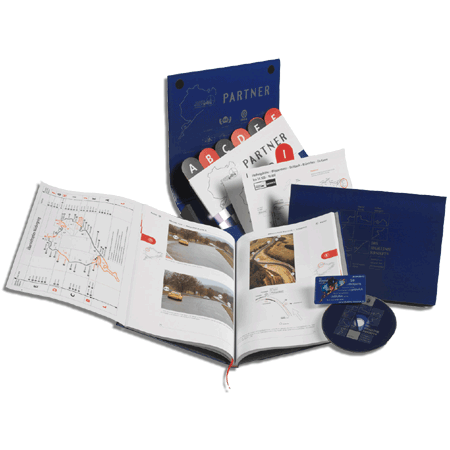
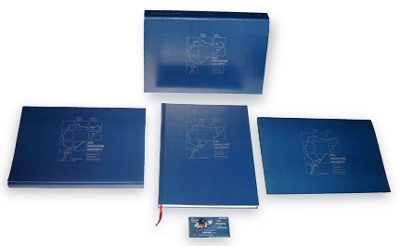
The full scope of knowledge accumulated by the instructors and coaches at the Scuderia Hanseat Fahrsicherheit Driving School, organizer of racing driver courses at the Nurburgring track for over 40 years, is now available as a three-part teaching set (comprising circuit maps, book and DVD). This Compendium is an indispensable aid to gaining the safety and speed you need to tackle the Nordschleife circuit.
The Ideallinie Concept communicates this unique competitive edge within a short time, to help students achieve skill levels normally only possible after driving hundreds of laps of the Nurburgring Nordschleife.
Why the Ideallinie Concept®?
To gain even a limited mastery of the Nurburgring Nordschleife track, drivers generally need to accumulate experience from hundreds of laps of the circuit. However, many of us are restricted in our access to this experience, taking a driving course for two or three days a year, perhaps, or clocking up a few laps on our own once in a while.
Unfortunately, memory is a short-term phenomenon, and a single lap of the Nordschleife has 21.217 km and a total of 73 turns. In addition, conditions on the track are constantly changing. This means that from one visit to the next, we need to complete at least three to five laps before we can pinpoint the areas where the track has been resurfaced or where there are roadworks, and identify the turning-in points and apexes of the bends and corners.
All in all, an expensive and time-consuming business! This is why we designed the Ideallinie Concept®, specifically targeted at reducing the time and effort involved in this phase.
The »ideal« racing line presented in this concept should not be treated as gospel. We are fully aware that no two drivers are the same, no car ever handles identically and no lap can ever be repeated down to the last detail. The drive system of the vehicle (rear wheel, front wheel or four wheel drive), the weather, the tyres and a host of other factors all play their part in affecting the driver’s ideal line.
Nevertheless, the ideal racing line really does exist. It’s the line that has been taught by Scuderia Hanseat Fahrsicherheit for almost 50 years, and it’s the line that forms the basis of our concept.
However, we must point out that no concept or theory, however sophisticated, and no photos or films can ever be substitutes for a real-life lap of the Nurburgring Nordschleife!
Ideallinie Concept®: Structure
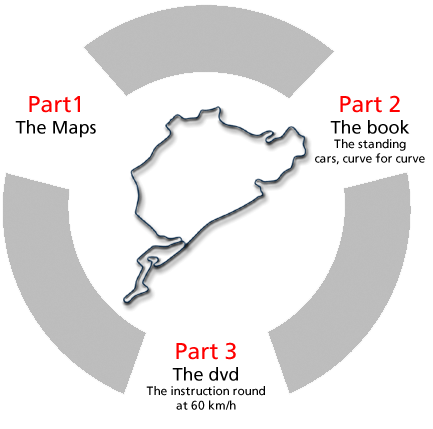
A concept is a method of teaching. It must be easy to understand and easy to use for its students, concise and clearly laid out. We have divided our Ideallinie Concept® into three parts:
- Part 1: Circuit maps
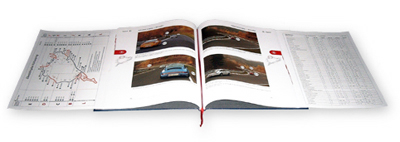
- Part 2: Stationary cars, turn by turn (Book)
- Part 3: Training lap at 60 km/h (Film)
These three parts interact to form a complete teaching pack based on a simple, clear structure.
The best way of describing our concept is as follows:
Nurburgring Nordschleife
The complete package
Targets and Objectives
Ideallinie Concept®: Targets and Objectives The optimum tool for solving complex problems, the Ideallinie Concept® is designed to enable the student to tackle an ideal lap of the Nurburgring Nordschleife. The targets and objectives of the course, section by section, are:
| Component | Goals |
| Circuit Maps | Immediate, rough overview of all lap sections |
| The book | Realistic, detailed analysis of the circuit’s key features (turn-in points, apexes, exit points) |
| The film | From individual turns (turning in, apex, exiting), we progress to examining longer turn sequences as a whole. The prime objective here is to follow »the line« – the ideal racing line – by applying precision, balance, speed (depending on external conditions) and smoothness. However, the ultimate aim – and the climax of emotion – is only achieved when we can drive »the line« in a state of flow. |
These three components – circuit maps, book and film – enable students to memorize and apply the ideal racing line for the Nurburgring Nordschleife rapidly and easily.

The Compendium for Nurburgring Nordschleife
Part 1: The Maps
Part 1: Circuit Maps The circuit maps drawn up by Rolf-Dieter Peschke (†) were out of print, and in some cases outdated. Rolf-Dieter Peschke, a long-standing instructor at Scuderia Hanseat Gesellschaft für Fahrsicherheit, had revised and updated the ideal line in the majority of the circuit maps. Scuderia generously provided us with the maps for further revision and duplication.
The circuit maps are the ideal aid for drivers looking to discover the ideal line – both for the circuit as a whole and for its individual sections. They give us an overview of each circuit section at a glance. The circuit maps deal with the following sections
- Nordschleife entrance and exit, Antonius-Buche, Tiergarten, Hohenrain, turnoff to Grand Prix track
- Hatzenbach approach, Hatzenbach I, Hatzenbach II, Hatzenbach III, Hocheichen
- Quiddelbacher Höhe, Flugplatz, Schwedenkreuz, Aremberg
- Fuchsröhre, Adenauer Forst
- Metzgesfeld, Kallenhard, Wehrseifen, Breitscheid, Ex-Mühle, Lauda-Kurve
- Bergwerk, Kesselchen I & II
- Kesselchen III & IV, Klostertal
- Klostertalkurve, Caracciola-Karussell, Hohe Acht approach, Hohe Acht
- Hedwigshöhe, Wippermann, Eschbach, Brünnchen, Eis-Kurve
- Pflanzgarten, after Pflanzgarten . Schwalbenschwanz approach
- Schwalbenschwanz, Kleines Karussell, Galgenkopf, Döttinger Höhe
- Grand-Prix track, Mercedes Arena, Sprintstrecke, Müllenbachschleife
Example: Circuit Map B shows a diagram of the ideal line for the Hatzenbach-Hocheichen section
In addition to the diagram of the route itself, letters and numbers are shown at certain points. The letter before the number indicates the location of the given point in the circuit maps, book and film. The number sequence starts at 1 for each circuit section except A.
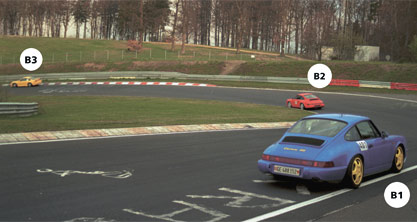
B1 A circle around the letter and number on the circuit maps indicates that the book contains a picture of the vehicle positioned exactly on the ideal line.
Helicopter B21 A helicopter symbol shown next to the letter and number indicates that the book contains an aerial shot of the circuit section at the point indicated. Camera B21 A camera symbol next to the letter and number indicates that the circuit section is included in the film. By using the circuit maps, we can rapidly gain an excellent overview of the entire section to be practised. We have a sound basis of information and can identify the key aspects of each section at a glance. However, there is one disadvantage accompanying these benefits. The circuit cannot be reproduced exactly to scale on paper (see above), so that the turns are effectively “pushed together” by the need to reduce the turn radii and shorten the straights. Because of this distortion of reality for technical reasons, we decided to add photos supplying complementary information – the inspiration behind the production of this illustrated book.
Nurburgring Nordschleife
The complete package

Part 2: The book for Nurburgring Nordschleife
Stationary cars – turn by turn
The book gives us the opportunity to examine the Nurburgring in depth – turn by turn. But there’s more!
Every turn or bend consists of a turn-in point, an apex and a turn-out point. To follow the ideal line perfectly, we need to judge these points correctly.
Unless otherwise specified, the blue Porsche is shown at the exact turn-in point, at the start of the turn or bend (coming out of the straight).
The red Porsche marks the exact apex of the turn – the point on the ideal line that is closest to the inside edge of the track. The yellow Porsche is shown at the exact turn-out point, or at the end of a sequence of bends.
We decided to include such a large number of photos for the following reason: If we had limited ourselves to a single picture with the car at the turn-in point, apex and turn-out point, we would not have been able to apply in-depth analysis at each point.
The major benefit of using stationary cars as opposed to circuit maps is their ability to show the situation realistically. The photos enable us to concentrate on vital details such as curb height and angle, any verges or run-off areas, points of attention along the circuit edge, distance between track and crash barriers, etc. We can examine every point minutely and gain an overall view of the turn or sequence of turns.
Note: In the photos, the drivers are shown without helmets – for the simple reason that all shots were taken using stationary cars.
In connected turns or sequences of turns, the cars were positioned in the exact ideal positions before the shots were taken, and remained there throughout the shoot while the photographer moved around to various standpoints.
We deliberately positioned the cars very close to the track edge. The points are demonstrated with an almost schoolmasterly precision. We recommend that when “feeling your way” towards the ideal line, you remain one wheel-width inside the track boundary. This is particularly important in wet track conditions for safety reasons!
The circuit maps and photos complement each other perfectly; at last, an actual photo that precisely corresponds to what the map tells us. Nevertheless, this combination of circuit maps and photos still has a few weaknesses. It does not cover the entire circuit, and the transition points from one circuit section to the next are shown either inadequately or not at all. Looking at the stationary cars still gives us no real idea of what it will be like to actually drive ourselves.
To understand exactly the line we have to take, we have to be able to see the circuit from the perspective of a moving car. For this reason, we asked two professional camera operators to film a circuit of the ideal line at a speed of 60 km/h.
Nurburgring Nordschleife
The complete package

Part 3: The film for Nurburgring Nordschleife
Instruction Circuit at 60 km/h
The first camera shows the route itself. The second camera focuses on my hands, to make it clear how little steering movement is necessary once we have found the ideal line. And by the way, high speeds require very little more steering movement than that shown in the film.
The film presents all the points examined in the circuit maps and the book, in the actual context where they occur on the track.
Example:
- We are heading for the Hatzenbach approach. B1 lights up before the turn-in point. As we approach the apex of the turn, B1 disappears and B2 lights up. As we continue to the turn-out point, B2 disappears from the screen and B3 lights up, and so on. The major benefit of the film is that we have plenty of time to memorize the points along the route with the assistance of the circuit maps and/or the book. We can watch each passage at any time, as many times as we want.
Orientation
There are two ways to find out simply and rapidly where we are on the circuit, or where we would like to be:
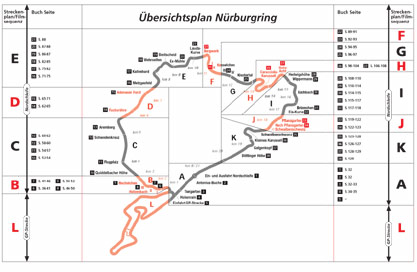
An overview is printed on the inside front cover of the book, supplying the following useful information at a glance:
- the route
- The letters for each section (inside of the course plan)
- The names of the passages (outside of the course plan)
- The reference number for the page in the book on which the corresponding photos appear
- The actual page number (book page)
- The reference of the circuit maps and film sequence (outside of the page numbers)
The inside back cover features an alphabetical list of all key information on how to use the circuit maps, book and film: (Excerpt from the alphabetical list on the inside back cover)
| Alphabetical order | The Maps | The book | The Film | |||
| Plan | Ref-Nr. | chapter | Ref.-Nr. | page | chapter | |
| Adenauer Forst | D | D6-D14 | D | D6-D14 | 65-70 | D |
| Antoniusbuche | A | A1-A2 | A | A1-A2 | 32 | A |
| Aremberg | C | C15-C18 | C | C15-C18 | 60-62 | C |
| Bergwerk | F | F1-F4 | F | F1-F4 | 89-91 | F |
| Breitscheid | E | E23-E26 | E | E23-E26 | 86-87 | E |
| Brünnchen | I | 113-118 | I | I12-I19 | 115-117 | I |
| Caracciola-Karussell | H | H4-H10 | H | H3-H10 | 98-104 | H |
| Döttinger Höhe | K | K17 | K | K17 | 129 | K |
(cutout from the alphabetical list on the inside of the rear cover)
example: Adenauer-Forst
Circuit Maps
Map: The route section is indicated by the letter D on the circuit map. Reference number: The reference number D6-D14 indicates where the section starts and finishes in the map. (The transition from one section to the next is flowing and does not have a precise boundary.)
The book
Chapter: Chapter: Chapter D of the book describes the route section. Reference number: D6-D14 indicate the photos in the book that show the points along the route. (The ref. no. in the circuit maps and the book may not always match, since not all points given in the circuit maps are documented in photos.) Page(s): 65-70 indicate the corresponding pages in the book.
The Film
Chapter: Chapter: The letter D indicates where we can find the route section on the DVD. The DVD is structured to enable us to watch each section individually.
You can find more nurburgring products in our shop:
Nurburgring Nordschleife
The complete package

Nurburgring Cup
Nurburgring vest
Nurburgring Mousepad
Nurburgring Shirt
